With all the free time I had this summer, I’ve been cleaning and organizing my room. During this process I realized that I don’t have anything to hold my jewelry so that my necklaces don’t get all tangled. I keep all my jewelry in a makeup bag, and I am always having a hard time trying to finding the pieces that I want. After scrolling through Pinterest for a bit I found some great ideas on how to make a DIY jewelry holder.
I wasn’t about to spend any money on this DIY project. I found an old piece of scrap wood in the garage. All I had to do was wash it off to clean it up. I wanted a vintage look for my jewelry holder so I was fine with my board being slightly beat up in some places. If you don’t want to go for a mismatched vintage look like I did then you can easily pick up some fresh wood and knobs up from a Lowes or Home Depot. And you think I do, DIY means inexpensive right? Well, if you do end up in Lowes or Home Depot, you can shop with a student discount!
1. First, clean off your piece of wood. It’s a good idea to do this even if you went out and bought a piece of wood. Cleaning the wood ensures that there is nothing stuck to the wood, like dirt or dust, which would mess up your paint or stain job. Once your piece of wood is all clean go ahead and paint or stain it! Let the wood dry.
2. Measure the length of your board and mark out the spots that you want to place your knobs. I had a super long board so I had five inches between each knob.
3. If you wanted to paint your knobs to match your room, like I did, now would be the time to paint them and let them dry.
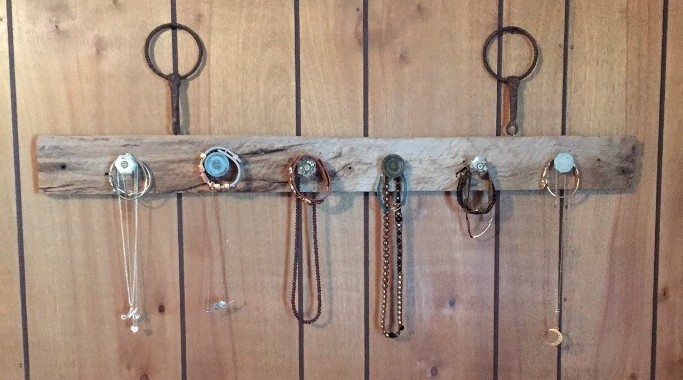
4. Once your knobs are dry, you can nail or screw them into place on your piece of wood.
5. Choose a spot where you want to hang your jewelry holder. Nail it into the wall and you’re done!
This is seriously the easiest DIY project I have ever done. If you chose to make this DIY I hope that you too find it fun and easy, and that you have an awesome new piece of room décor!
These are sponsored links. All opinions are my own.
Freshman orientation...you're excited for a new chapter in your life. You're excited to see your home for the next 4…
The Hollywood version of the most charming American city is New York. Everything happens there: watershed meetings, world's Armageddons, career…
For the purpose of this blog we will call the person who is obsessed with coffee the “Craver”. They crave…
As New Years Eve approaches, many begin to think about their style for the holiday season. Everything from clothes, home…
Got an astrology lover in your life that you're shopping for? If so, below are 20 great zodiac gifts for…
Your makeup look speaks volumes - and with the right eyeshadows, you can conquer the world. With the vast number…

